Module management
A module is an application with its own screen that appears as a tool in Vesika's sidebar. Tools such as Petition drafting, the Interest calculator or Contract review are modules. In Module management (Modül Yönetimi) you see these modules, add your organisation's own, test and publish them, and decide who can use them.
Workspace → Yönetim (Administration) → Modül Yönetimi (Module management)
Only administrators see this tool. Only administrators can add and publish modules, and only they see modules that are not yet published (drafts).
What is a module?
What an administrator needs to know:
- Modules are written with Vesika's module development library (the Vesika SDK). A developer or an AI coding agent writes the module; you upload, test and publish it.
- A module runs in a closed space with no internet access. It can use AI, the legal database, document reading and saving only through Vesika. Which of these it uses shows on its card and in its settings as permissions: Yapay zekâ (AI), Hukuk veritabanı (Legal database), Belge okuma (Document reading), Kayıt (Saving).
- Whoever opens a module pays for its AI use from their own spend limit, and what the module saves is kept in that person's account.
- Every upload creates a new version. Users keep using the published version until you publish another one.
The detailed guide for developers is in the Vesika SDK's README and in the AGENTS.md file that comes with the SDK.
The module list
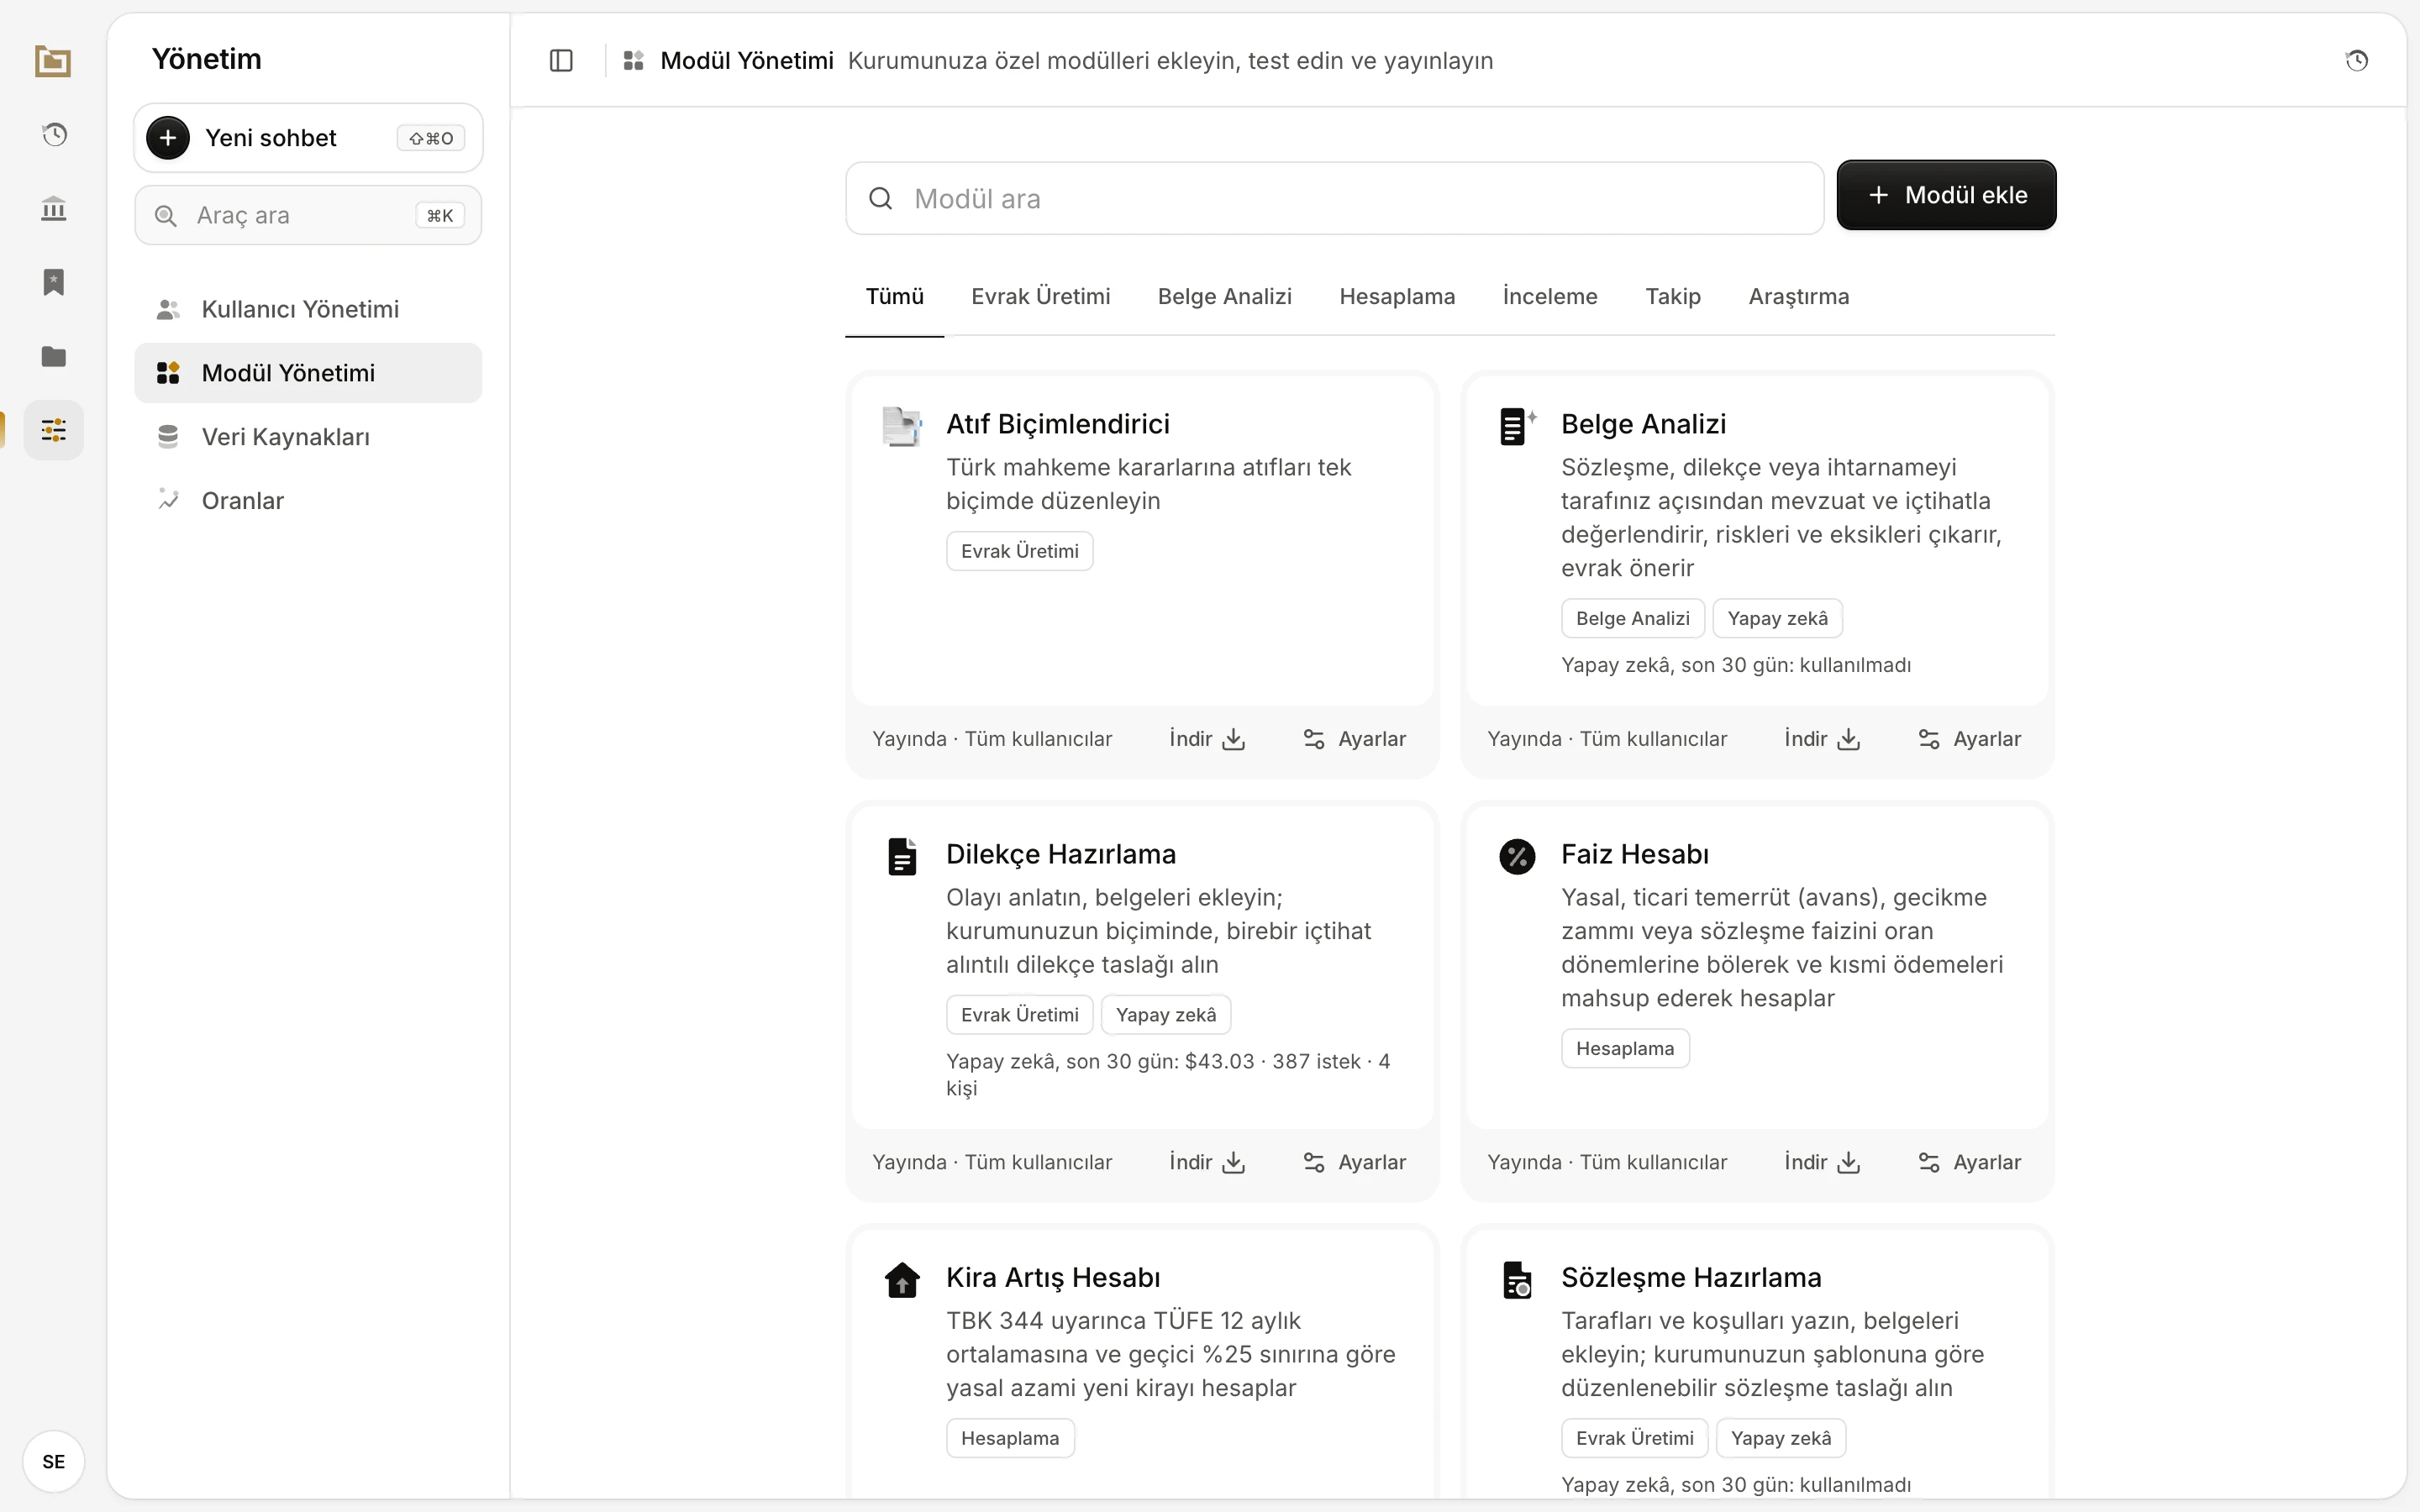
- Modül ara (Search modules): by name, description and tags.
- Modül ekle (Add module): opens the upload screen.
- Categories: the sections modules appear under in the sidebar.
- A module card. Click it to open the module.
- Status and access, such as Yayında · Tüm kullanıcılar (Published · All users) or Taslak · yalnızca yöneticiler (Draft · administrators only).
- İndir (Download the source as .zip) and Ayarlar (Settings).
Each card shows the module's name, description, category and, if it uses AI, a Yapay zekâ (AI) tag. For modules that use AI, the card also shows the period's spend, number of requests and number of users (the amounts in the screenshot are examples). A Taslak (Draft) tag next to the name means the module is not published yet; Yeni taslak (New draft) means a published module has a new, unpublished version.
Clicking a card opens the module: the published version for a published module, the draft for a draft. İndir (Download) downloads the source of the module's latest version as a .zip. Ayarlar (Settings) opens the module's settings page.
Step by step: adding a module
- Click Modül ekle (Add module).
- In Kaynağı yükle (Upload the source), drop the module's .zip file on the box or pick it with Dosya seç (Choose file). To upload a whole folder, use Klasör seç (Choose folder).
- The selected files are listed under the box. If there is no
vesika.jsonat the top, a "vesika.json yok" (no vesika.json) warning appears. - Click Yükle ve derle (Upload and build). Vesika builds the module.
- If the build succeeds, "Modül oluşturuldu · … · sürüm 1" (Module created · … · version 1) appears. If it fails, each error is listed with its file name under "Derleme başarısız" (Build failed); pass that list on to the developer.
- Try the draft with Test et (Test), then go to the module's settings with Yayınla (Publish) and publish it there.
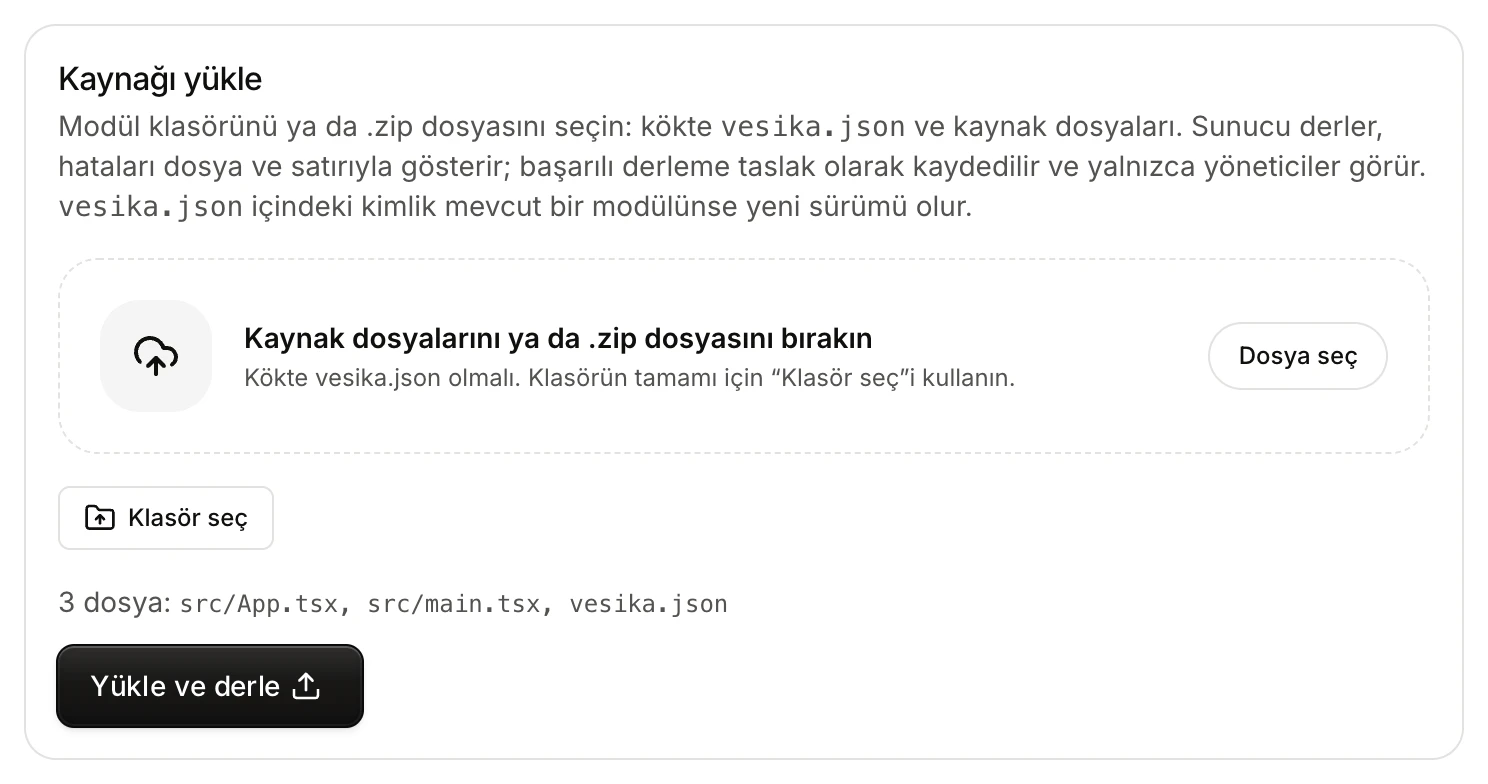
- Drop area: a .zip or source files; Dosya seç (Choose file) also works.
- Klasör seç (Choose folder): the whole module folder.
- The files to upload.
- Yükle ve derle (Upload and build).
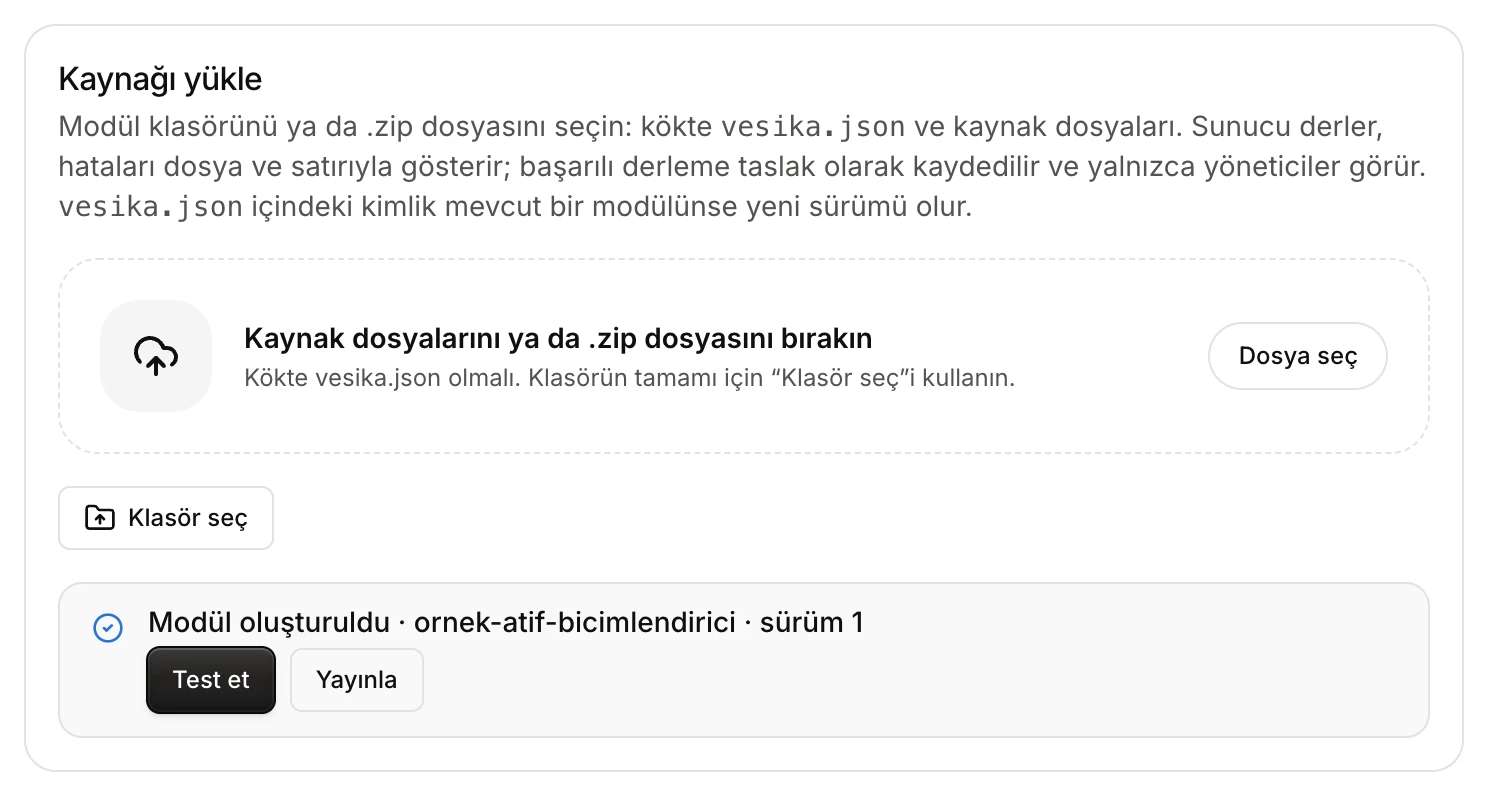
- The result: the module's identifier and version number.
- Test et (Test): opens the draft.
- Yayınla (Publish): goes to the module's settings.
The module's identifier is written in its vesika.json file. If a module with that identifier already exists, the upload does not create a new module; it becomes a new version of the existing one.
Ready-made example modules
The Hazır örnek modüller (Ready-made example modules) section of the same screen lists the examples that come with the Vesika SDK. Ekle (Add) adds one as a draft; once added, the button reads Eklendi · Ayarlar (Added · Settings) and opens the module's settings. Developers can also start their own module from an example.
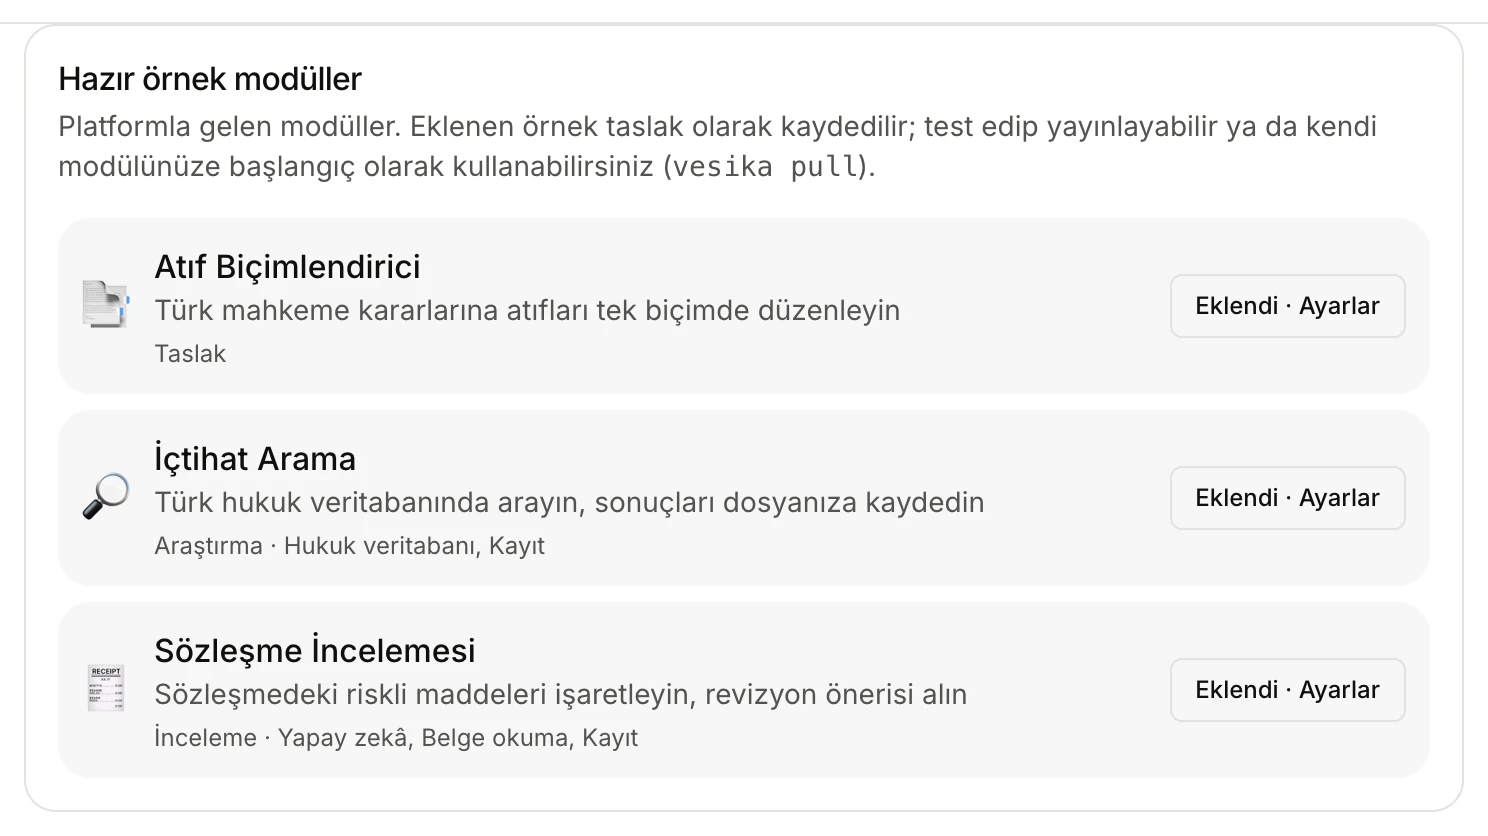
- An example: name, description, category and permissions.
- Eklendi · Ayarlar (Added · Settings). Examples not yet added show Ekle (Add).
Testing a draft
Taslağı test et (sürüm …) (Test the draft, version …) in the module's settings, or Test et (Test) after an upload, opens the draft on your screen. Meanwhile users keep using the published version; the draft is invisible to them. Try the module on a real task and judge the result yourself.
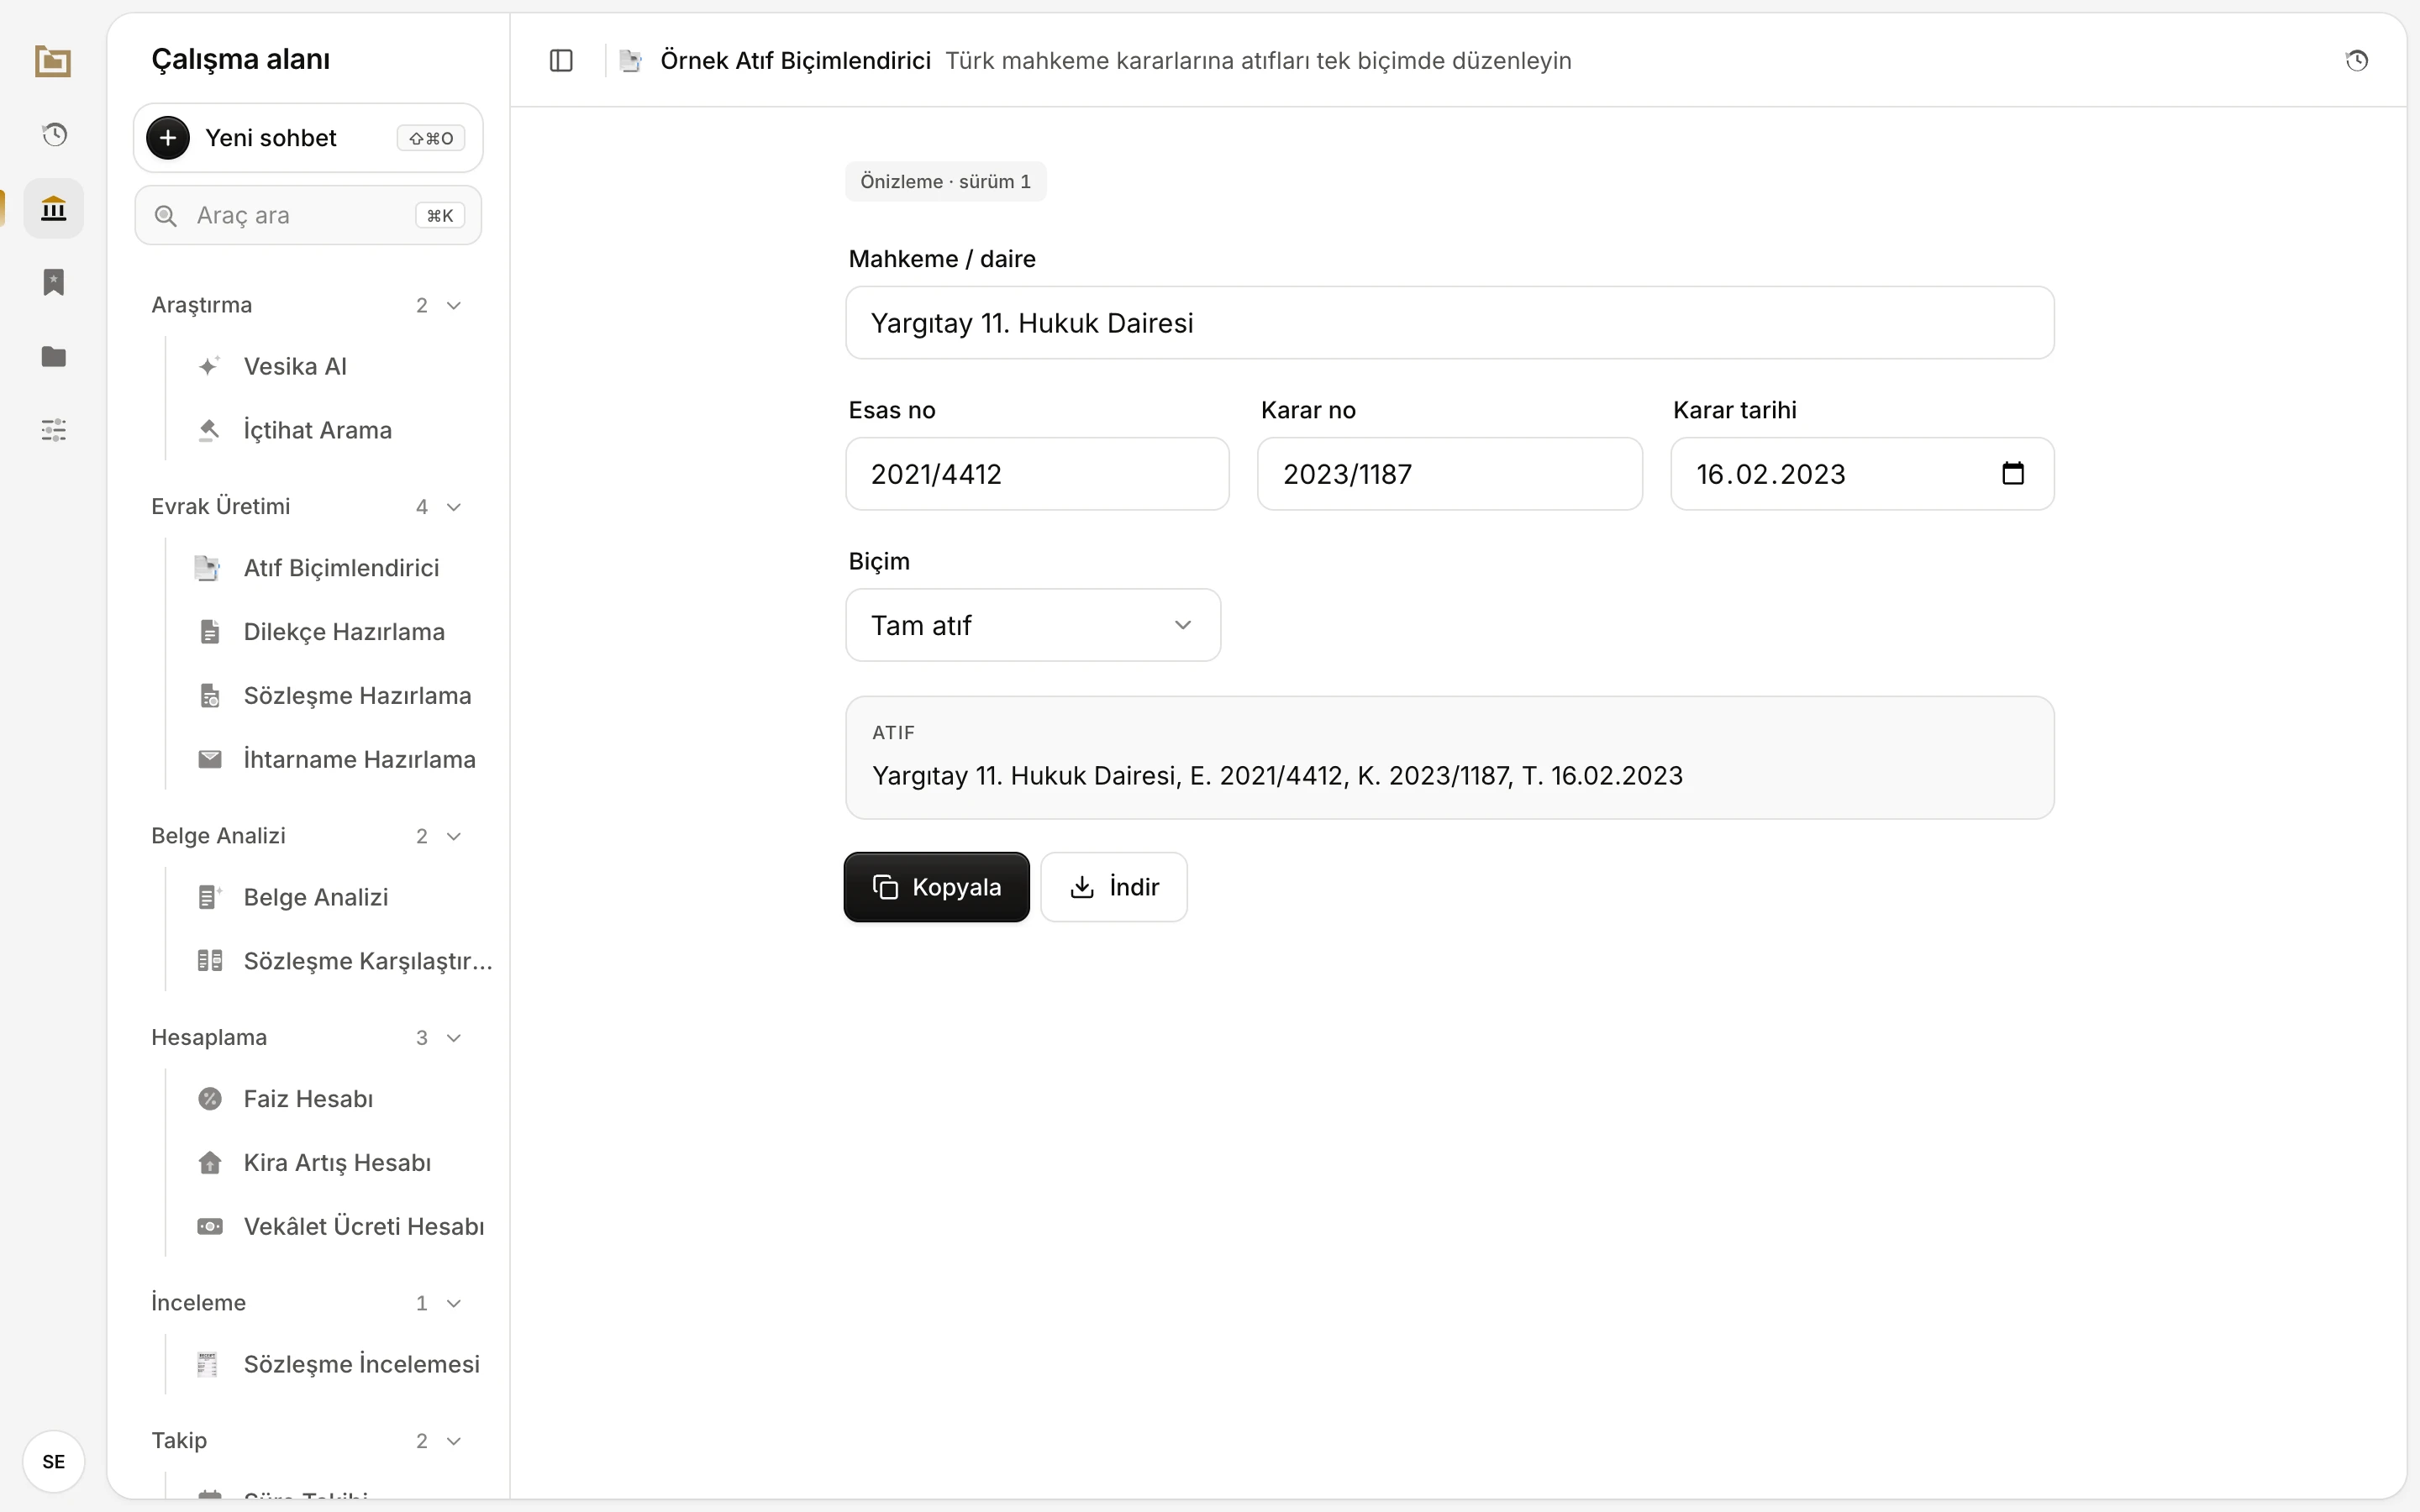
- Önizleme · sürüm … (Preview · version …): what is open is the draft under test, not the published version.
Publishing
On a draft module's settings page:
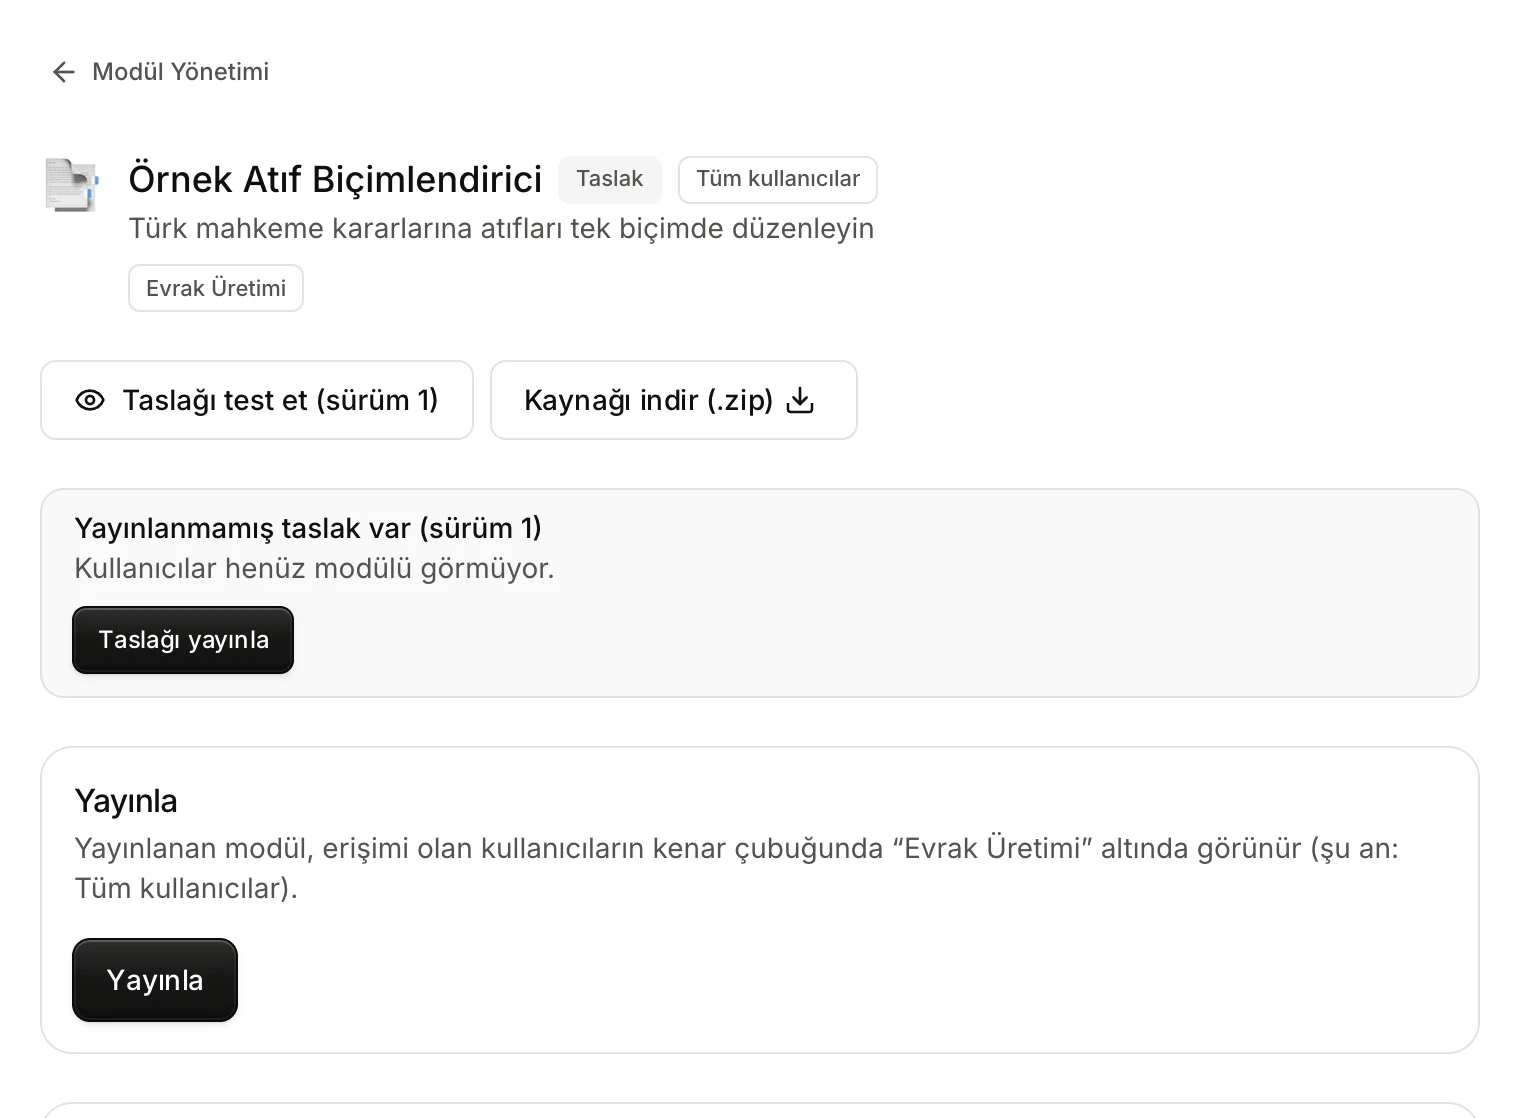
- Name, status (Taslak Draft, or Yayında · sürüm … Published · version …) and access.
- Taslağı test et (sürüm …) (Test the draft).
- Kaynağı indir (.zip) (Download source).
- Yayınla (Publish): opens the module to the users who have access.
- First set access under Kimler kullanabilir (Who can use it) below; it can be saved before publishing.
- Click Yayınla (Publish). The module appears in the sidebar of users with access, under its category.
- When you upload a new version of a published module, a "Yayınlanmamış taslak var (sürüm …)" (Unpublished draft, version …) notice appears at the top and says which version users are on. After testing the draft, click Taslağı yayınla (Publish the draft).
Publishing also carries the version's name, description, category and permissions from its vesika.json over to the module users see.
Who can use it
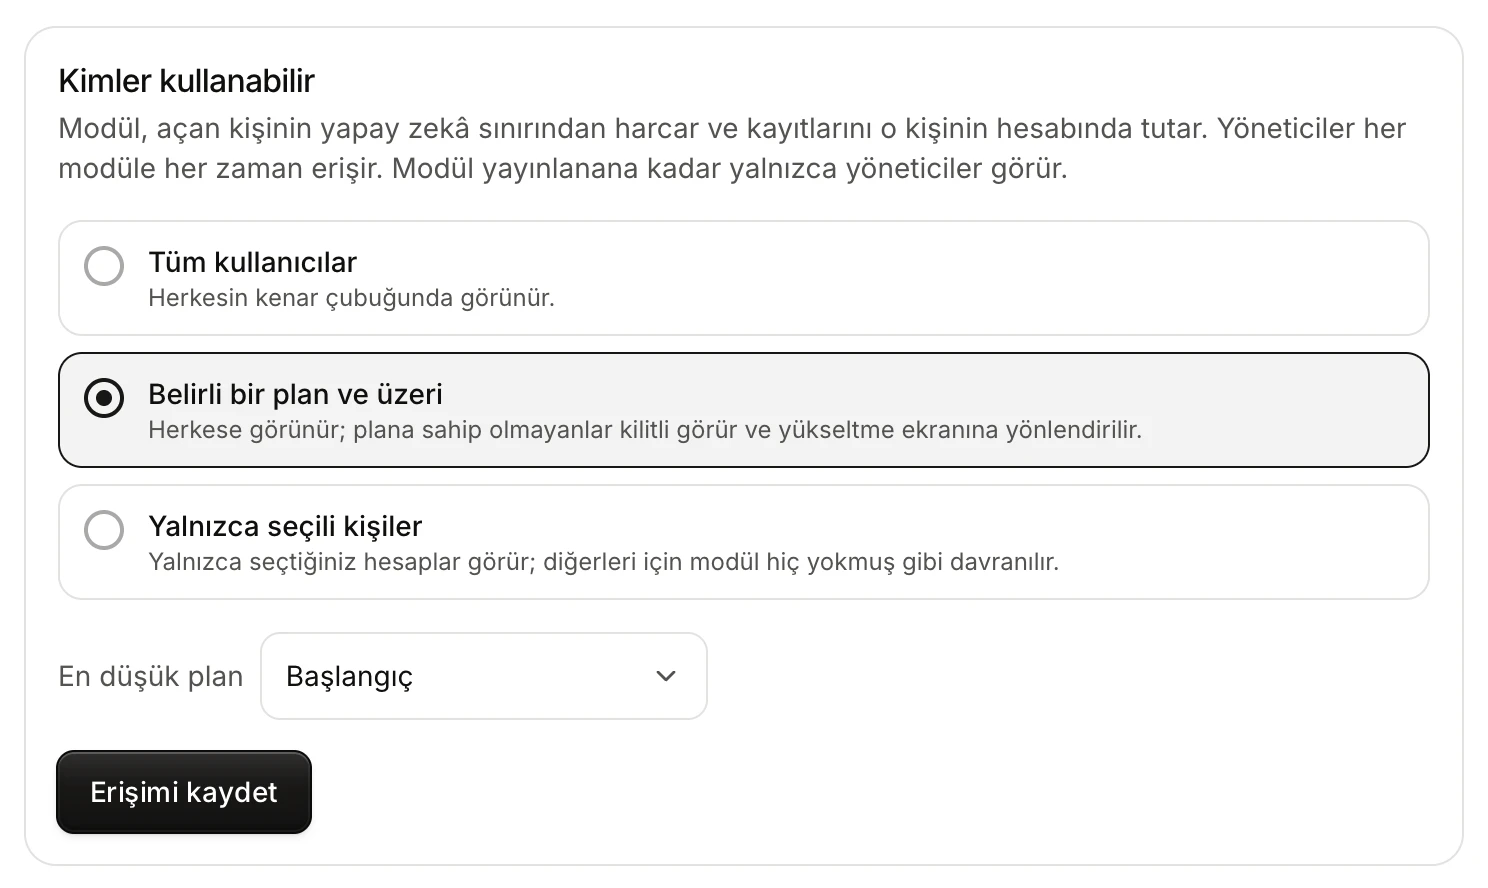
- Tüm kullanıcılar (All users): in everyone's sidebar.
- Belirli bir plan ve üzeri (A plan and above): those without the plan see it locked.
- Yalnızca seçili kişiler (Only selected people): nobody else sees it.
- En düşük plan (Minimum plan).
- Erişimi kaydet (Save access).
- Tüm kullanıcılar (All users): the module appears in everyone's sidebar.
- Belirli bir plan ve üzeri (A plan and above): pick a plan under En düşük plan (Minimum plan). Everyone sees the module; people without that plan or a higher one see it locked and are sent to the upgrade screen when they try to open it. In this guide's sample setup, for example, Contract comparison is set to Başlangıç ve üzeri (Starter and above).
- Yalnızca seçili kişiler (Only selected people): search people by name or email in the list that opens and tick them; the chosen ones appear as tags above, and clicking a tag removes it. For everyone else the module behaves as if it did not exist. You must choose at least one person.
When you click Erişimi kaydet (Save access), the change applies at once: Vesika checks access on every request the module makes, so someone who loses access can no longer use it from that moment. Administrators always have access to every module.
To switch a module off for just one person, use Modülleri aç / kapat (Turn modules on / off) in User management.
AI usage
For modules that use AI, the Yapay zekâ kullanımı (AI usage) section of the settings shows the module's spend in the current period, its requests and tokens, how many people used it and how much each spent. This spend also counts towards each user's own limit.
Icon
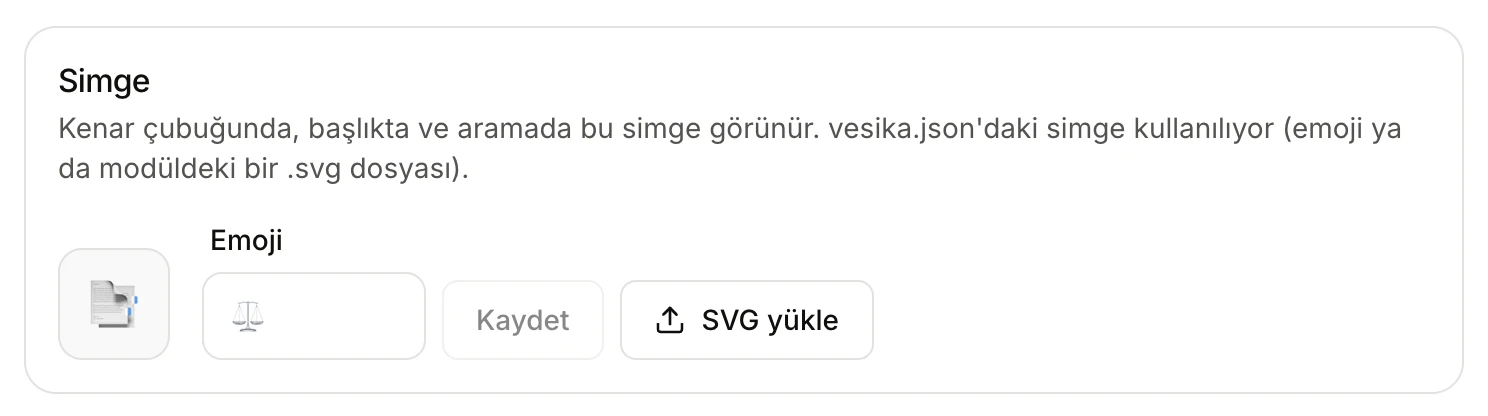
- Emoji: type an emoji and click Kaydet (Save).
- SVG yükle (Upload SVG): an SVG file under 16 KB.
You can change the icon shown in the sidebar, the header and search without uploading a new version. The icon you set here replaces the one in vesika.json; to go back, click vesika.json'daki simgeye dön (Back to the icon in vesika.json).
Versions
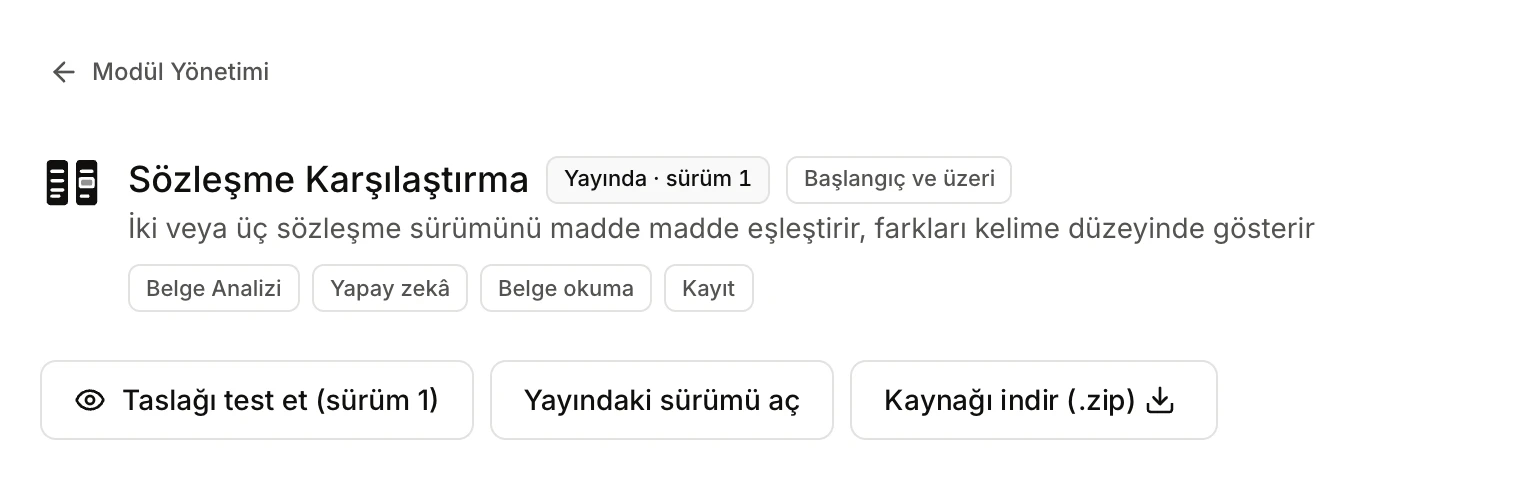
- Yayında · sürüm … (Published · version …) and the access badge (here Başlangıç ve üzeri, Starter and above).
- Yayındaki sürümü aç (Open the published version): the version users see.
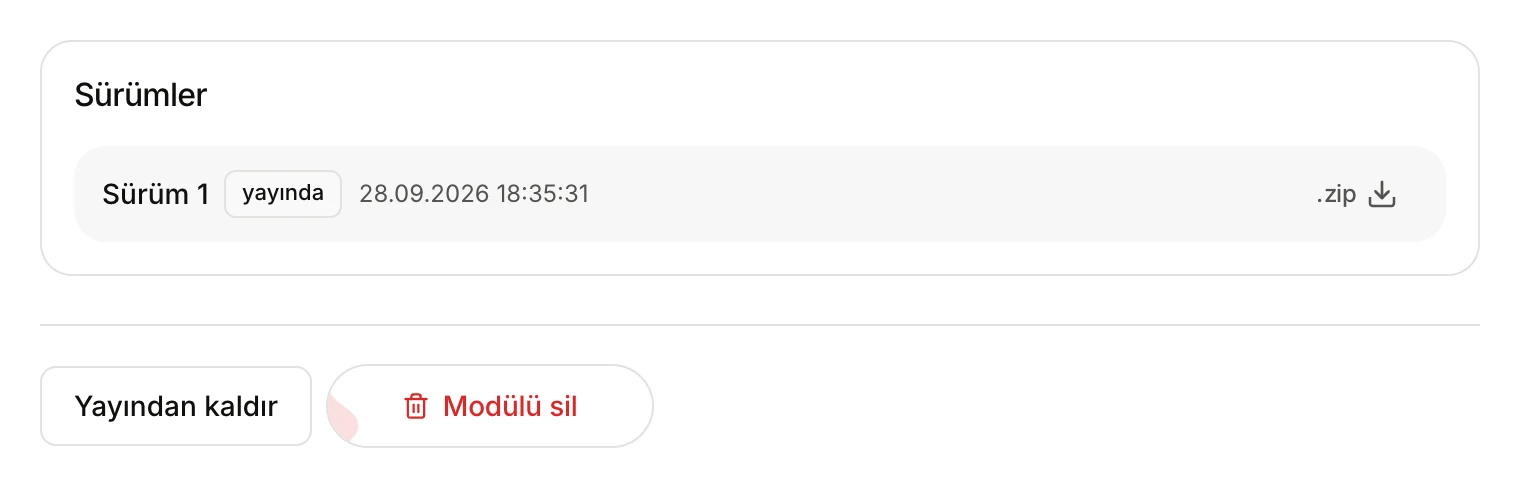
- A version: its number, yayında (published) or taslak (draft) tag, upload time and .zip. Versions that are not published also have Bu sürümü yayınla (Publish this version).
- Yayından kaldır (Unpublish).
- Modülü sil (Delete module, hold).
Sürümler (Versions) lists all of a module's versions, newest first. On each row:
- .zip: downloads that version's source.
- Bu sürümü yayınla (Publish this version): replaces the published version with this one. If a new version causes trouble, this is how you go back to the previous one.
You can also upload a new version of an existing module from Yeni sürüm yükle (Upload a new version) on its settings page. Source uploaded there always becomes a new draft version of this module, whatever identifier its vesika.json has; it is built with Yeni sürüm olarak yükle (Upload as new version).
Unpublishing and deleting
- Yayından kaldır (Unpublish): turns the module back into a draft; it leaves everyone's sidebar except administrators'. Versions are kept, and you can publish again whenever you like.
- Modülü sil (Delete module): hold the button. The module and all its versions are deleted. What users saved with the module is not deleted; a module uploaded again with the same identifier reaches it again.
For developers: tokens and setup
The Yapay zekâ ajanıyla modül yazmak (Writing a module with an AI agent) section at the bottom of the Modül ekle (Add module) screen gives a developer, or a coding agent (such as Claude Code, Codex or Cursor), what they need to write the module on their own computer and upload it straight to Module management.
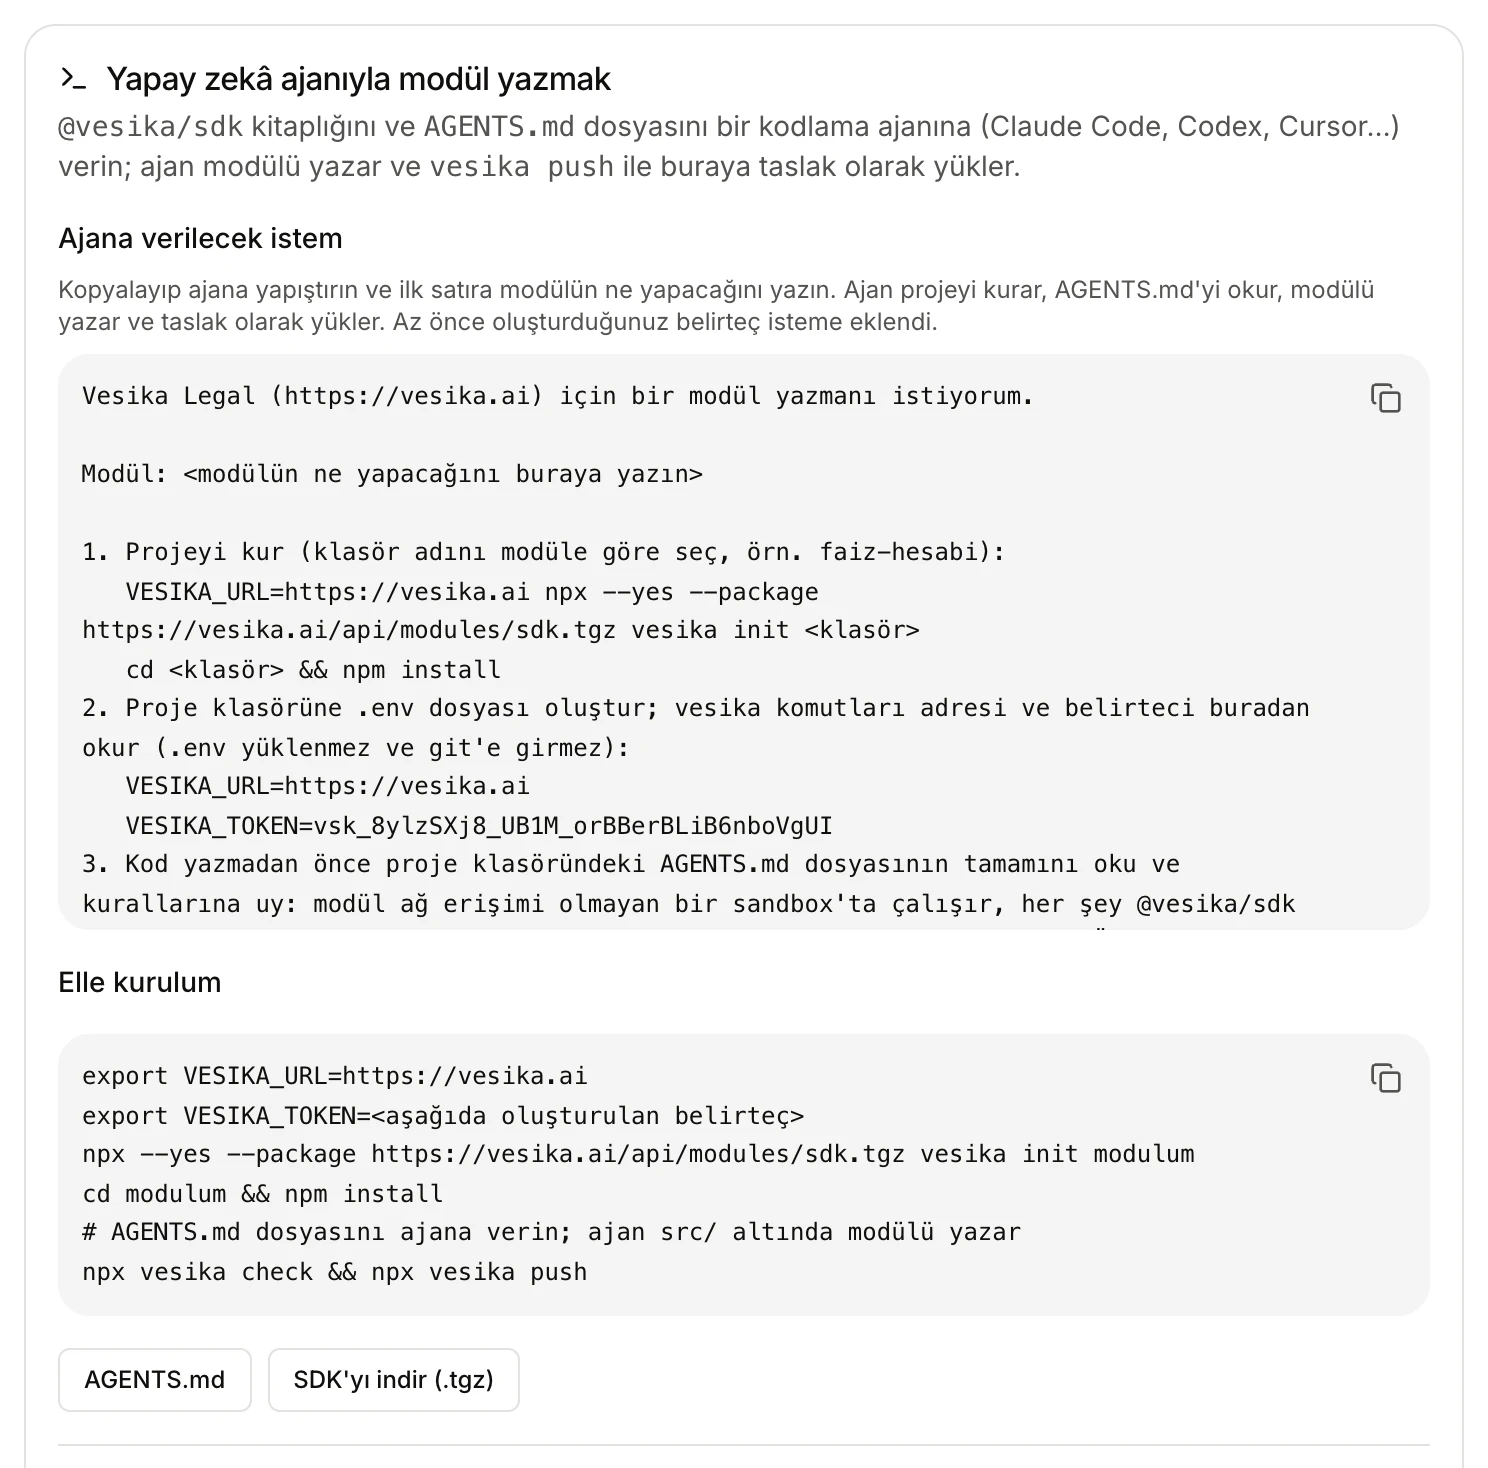
- Ajana verilecek istem (Prompt for the agent): copy it to the agent and write on the first line what the module should do.
- Elle kurulum (Manual setup): the same steps as commands.
- AGENTS.md and SDK'yı indir (.tgz) (Download the SDK).
The agent sets up the project, writes the module, checks it and uploads it as a draft. The prompt tells the agent not to publish; publishing is always done on this screen, by you.
To upload, the agent or developer needs a CLI token (CLI belirteci):
- In CLI belirteçleri (CLI tokens), give the token a name (for example, the computer it will be used on) and click Oluştur (Create).
- The token is shown once, in the "Belirteci şimdi kopyalayın" (Copy the token now) box. Take it with Kopyala (Copy) and give it to the developer over a secure channel. The token you just created is also added to the prompt above.
- Tokens are listed with their name, first characters and when they were last used.
- Revoke a token you no longer need, or suspect someone else has, by holding İptal et (Revoke); every setup using it can no longer upload.
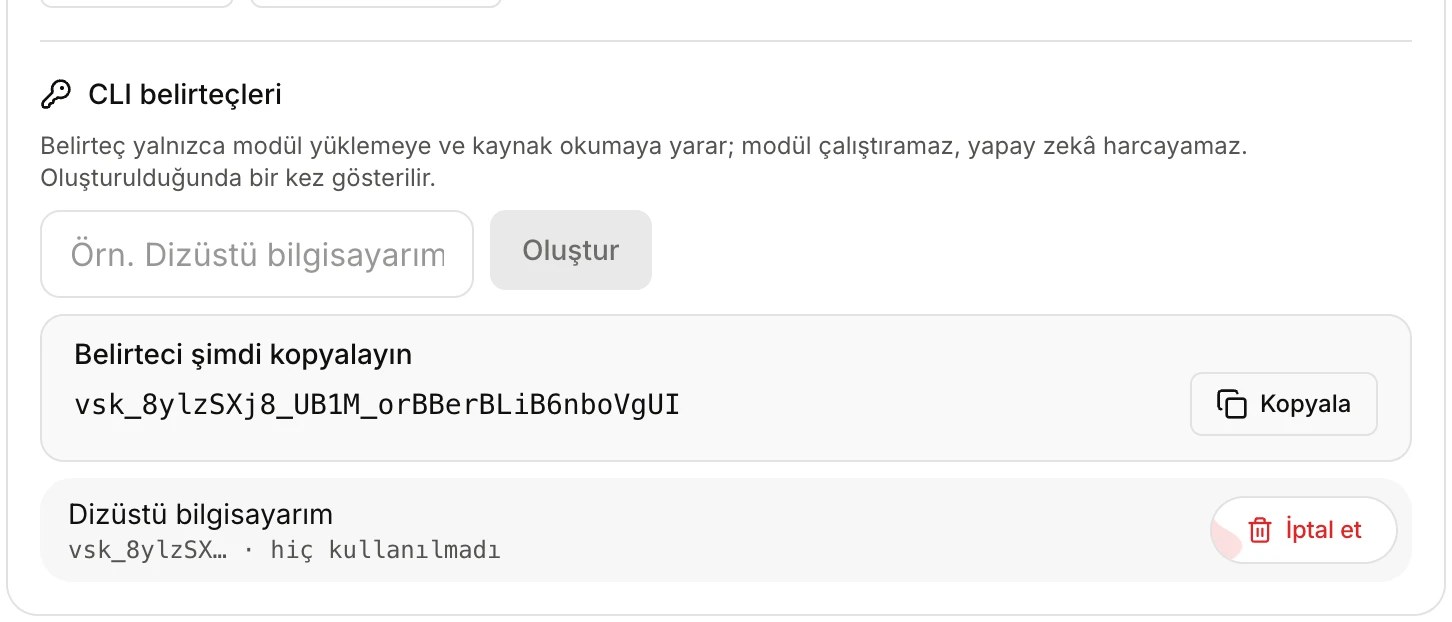
- The token's name.
- Oluştur (Create).
- The new token, shown only now.
- The token list: name, first characters, last use.
- İptal et (Revoke, hold).
A token can only upload modules and read module source; it cannot run modules or spend on AI. Tokens belong to the administrator who created them; the list shows only your own.
Limits and things to check
- Always test the draft before publishing. Publishing opens the module to everyone with access at once.
- What a module produces (a calculation, a draft, an analysis) must be checked just like the output of Vesika's own tools; mistakes made by the module's author reach users.
- An upload takes only source files (
vesika.json, code, style and SVG files); folders such asnode_modulesare ignored. - A deleted module cannot be brought back; if you want to keep its versions, download them with Kaynağı indir (.zip) (Download source) before deleting.